ZMPlugin Documentation
1. Install ZMPlugin
From WordPress
To install ZMPlugin, navigate to the WordPress Dashboard >> Plugins >> Add New. Then type “ZMPlugin” in the search box, click install and activate.
Via ZMPlugin.zip file
Go to Dashboard >> Plugins >> Add New >> Upload Plugin.
Select the ZMPlugin.zip file you downloaded earlier and click install now. After that, activate the newly installed plugin.
2. ZMPlugin Dashboard
The ZMPlugin dashboard contains the overview of all ZuestMedia extensions that are installed. Here you can directly manage all extensions (plugins) and add new ones.

3. Cookie-Banner
Activate the cookie consent banner here. When enabled, an overlay will be displayed on each web page until an interaction has taken place.
The cookie banner will only be displayed if one or more analytics scripts are included.
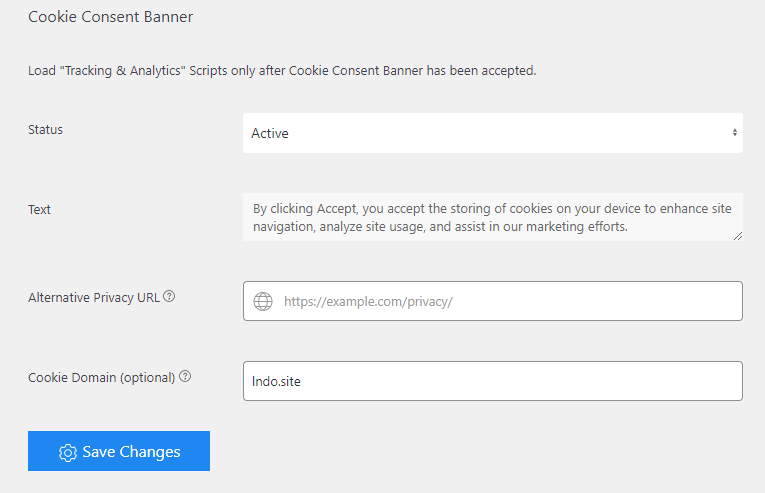
You can specify a custom text if the default one does not suit your needs.
The “Alternative Privacy URL” field can be used to link to an alternative privacy page. Otherwise the privacy page defined in the WordPress settings will be used by default.
In the Cookie Domain field, you can configure the Cookie Consent banner so that the consent or refusal applies to the entire domain (e.g. example.com) including sub-domains (e.g. subdomain.example.com). For this purpose, the main domain must be specified without protocol or path, e.g. “example.com”. If you do not use sub-domains or want to use a separate consent form per sub-domain, you can simply leave this field blank.
4. Private mode
When private mode is enabled, all visitors who are not logged in will be redirected. Either to the login page or a page of your choice.
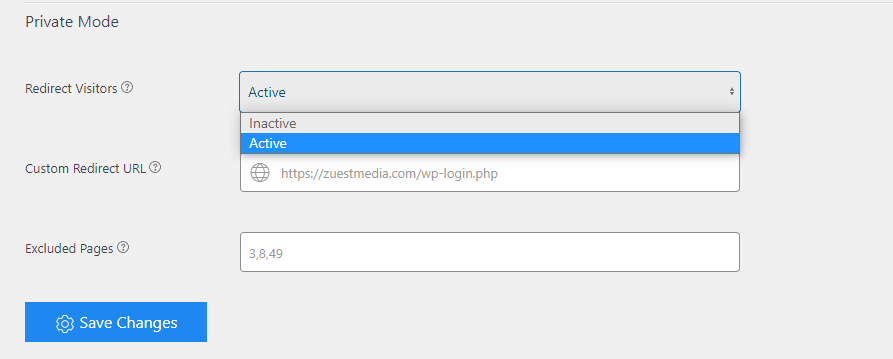
By default, visitors will be redirected to the wp-login page. Place a custom URL where you want your visitors to land if not on the login page. Don’t forget to exclude this page.
Add a comma-separated list of pages to exclude from private mode. Use page-id’s or page-slug’s.
5. Analytics
Add one or more analytics tools to your website. Matomo (self-hosted), Google Analytics (GA4) and Google Tag Manager are available.
If the cookie banner is enabled, the scripts that are not excluded from cookie consent will not be loaded until consent is given.
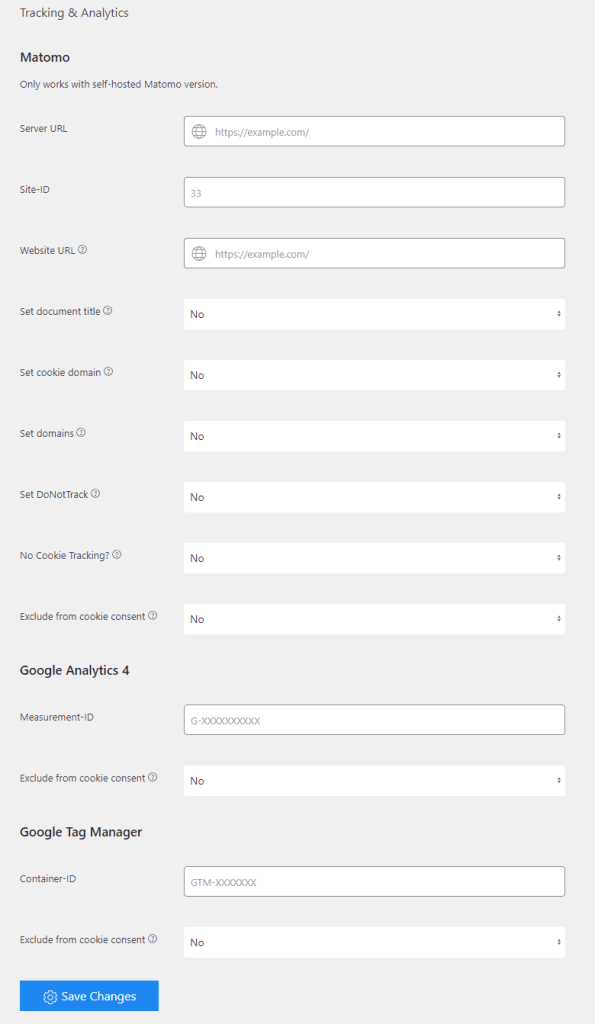
Matomo (self-hosted)
If you are using a self-hosted Matomo server, you can easily add the tracking script to your website by specifying your server address and site ID to enable tracking.
Specify the website URL if you enable additional Matomo settings that allow tracking across multiple domains or subdomains.
Using “No-Cookie Tracking”, Matomo can be used DSGVO compliant without cookie consent banner. However, this also requires the Matomo server to be configured in a DSGVO-compliant manner (e.g. the IP must not be recorded). More about this here: https://matomo.org/guide/manage-matomo/privacy/
Google Analytics (GA4)
The Google Analytics (GA4) tracking script can be included on your website by specifying the “Measurement ID”, which can be found in your Analytics account under Streams.
You can optionally exclude Google Analytics from cookie consent. As far as we know, Google Analytics cannot be operated in a DSGVO-compliant manner without consent, even if no cookie is set at all.
Google Tag Manager
With the Google Tag Manager, Analytics scripts and/or other scripts can be integrated. Depending on what is integrated, the Google Tag Manager can be loaded with or without cookie consent.
6. SMTP Mail
With the option “SMTP Mail” all system emails sent from your WordPress website can be sent via your own SMTP server. All emails that would normally be sent with the PHP mailer using the wp_mail() function will be sent via your SMTP server once enabled.
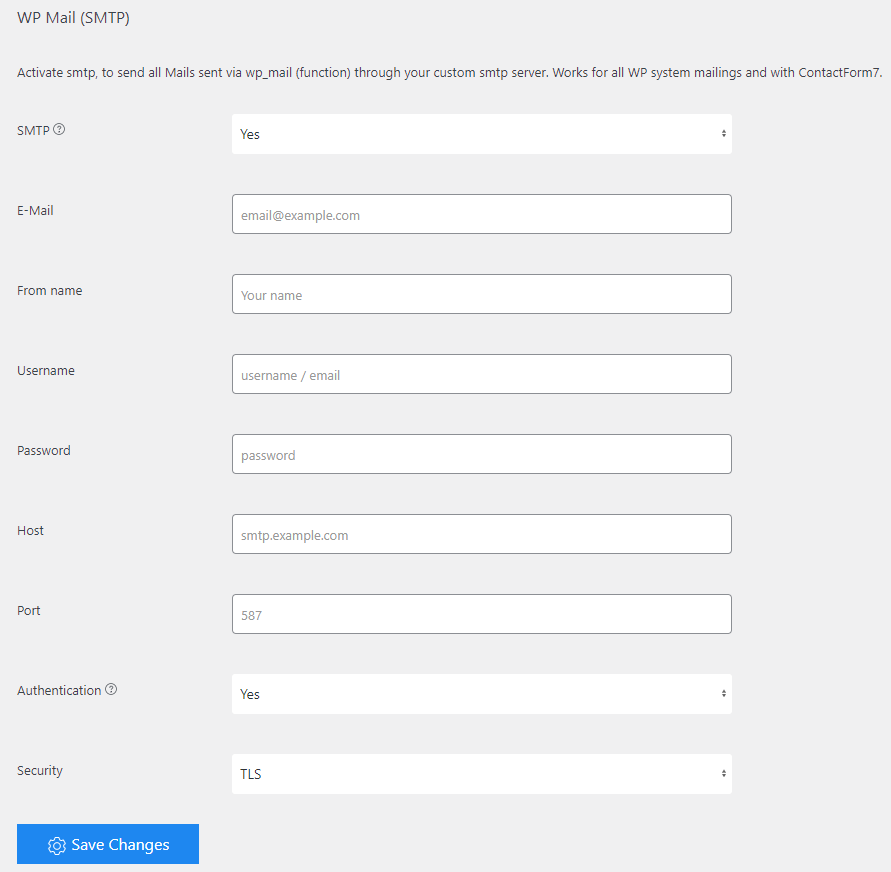
After activation, various fields appear that you need to configure for sending via your SMTP server. Fill the fields with the information according to your email provider. Mostly easy to find with a short Google search for “SMTP settings + name of your email provider”.
Once all the details are saved, be sure to test if the emails are sent and arrive in your inbox. You can test sending WordPress system emails by using the “Forgot Password” feature or creating a new user account.
Contact Form 7 works with SMTP Mail
If you use the popular WordPress plugin “Contact Form 7”, the emails sent through the contact form will also be sent through your SMTP server with SMTP mail settings enabled. Again, a quick test is recommended after switching to SMTP.
7. WP Dashboard
Here you can make display settings in the WordPress Dashboard:
- Hide the WordPress logo & menu.
- Hide the help tabs
- Change the footer text that is displayed in the bottom left corner of the WordPress Dashboard
8. WP Login
You can easily personalize the wp-login.php page with the Title, Image URL, Target URL settings. Secondly, you can enable redirect to home page after login is done (instead of dashboard).